Lawn renovation completely transforms a failing lawn by removing the old grass and starting fresh with new seed, proper soil preparation, and strategic timing. The process takes 8-12 weeks from start to established lawn and costs $0.10-0.25 per square foot for a DIY approach. Fall renovation (August 15 to September 30) gives new grass the best chance to establish before winter dormancy.
A complete renovation makes sense when your lawn is more than 50% weeds, has significant bare patches, or poor soil conditions that overseeding can’t fix. According to the University of Minnesota Extension, renovation produces better long-term results than overseeding when existing grass coverage falls below 40%.
Key Takeaways
- Fall timing (August 15-September 30) gives cool-season grass 6-8 weeks to establish before first frost
- Complete soil testing and amendment adds $50-100 but improves success rates by 60-70%
- Proper seed-to-soil contact requires raking or light cultivation after seeding
- Daily watering for first 3 weeks keeps seed moist without washing it away
- Total project costs $500-1,500 for average 5,000 sq ft lawn when done yourself
When Should You Renovate Instead of Overseed?
Choose complete renovation when your lawn shows these conditions: more than 50% weeds, compacted soil that water pools on, significant bare patches covering 30% or more of the area, or persistent disease problems. The University of Connecticut Extension recommends renovation over overseeding when existing grass coverage drops below 40%.
Overseeding works better for lawns with 60% or more healthy grass that just need thickening. If you can walk across your lawn and count more weed plants than grass plants in a typical square foot, renovation beats trying to patch up what’s there.
Here’s a quick test for soil compaction: Push a screwdriver into your soil after a light rain. If it won’t penetrate 4-6 inches easily, you’ve got compaction issues that require the soil work that comes with full renovation.

What’s the Best Timing for Lawn Renovation?
Late summer renovation (August 15 through September 30) works best for cool-season grasses like fescue, Kentucky bluegrass, and perennial ryegrass. This timing gives new grass 6-8 weeks to establish before the first killing frost.
Spring renovation (April 1-May 15) ranks second but faces more weed competition. Crabgrass and other summer annuals germinate alongside your grass seed, which means more herbicide applications during establishment.
Avoid renovation during summer heat or late fall. Summer temperatures above 85°F stress new seedlings, while seeding after October 1 in northern regions doesn’t give enough establishment time before winter kills everything.
| Season | Success Rate | Pros | Cons |
|---|---|---|---|
| Late Summer (Aug 15-Sep 30) | 90-95% | Cool temperatures, less weeds, fall moisture | Limited time window |
| Spring (Apr 1-May 15) | 75-80% | Long growing season ahead | Heavy weed pressure, variable weather |
| Summer (Jun 1-Aug 15) | 40-50% | Immediate results visible | Heat stress, high water needs |
| Late Fall (Oct 1+) | 20-30% | Less expensive contractors | Poor establishment, winter kill |
How Do You Test and Prepare Soil for Renovation?
Start with a professional soil test 4-6 weeks before renovation to determine pH, nutrient levels, and organic matter content. Most county extension offices provide testing for $15-25, or use a certified lab like A&L Great Lakes for $20-30.
Your soil test results guide amendment decisions. Most cool-season grasses prefer pH between 6.0-7.0. If your pH reads below 6.0, apply lime at rates specified in the test results. For pH above 7.5, sulfur application helps lower pH over time.
Organic matter improvement makes the biggest difference in renovation success. Add 1-2 inches of quality compost across the entire area before final soil preparation. This typically requires 2-4 cubic yards per 1,000 square feet. We’ve found this single step dramatically improves water retention and root development.
Match phosphorus and potassium amendments to soil test recommendations. Skip high-nitrogen fertilizers during soil preparation, they’ll burn new seedlings. Instead, use a starter fertilizer with lower nitrogen content (like 18-24-12) at seeding time.

What Equipment Do You Need for DIY Renovation?
Essential equipment includes a slit seeder or broadcast spreader, core aerator, rake, and reliable irrigation system. Renting equipment costs $150-300 for a weekend but produces way better results than trying to make hand tools work.
Slit seeders provide the best seed-to-soil contact by cutting grooves and dropping seed directly into them. Rental rates run $60-80 per day. For areas under 2,000 square feet, a quality broadcast spreader like the Scotts Elite ($120) works adequately when you rake thoroughly afterward.
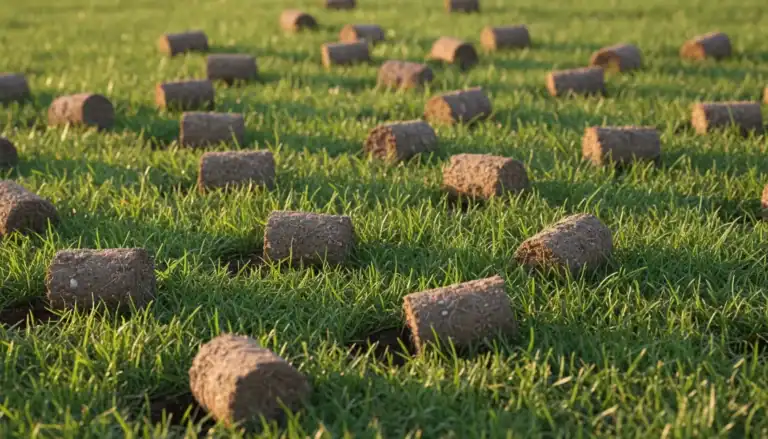
Core aerators relieve soil compaction and improve water infiltration. Plan to rent a walk-behind unit for $40-60 per day or hire the aeration service for $80-120 per 5,000 square feet.
Irrigation equipment varies by property size. Oscillating sprinklers work for small areas, but large renovations need multiple sprinkler zones or a temporary irrigation system to maintain consistent moisture.
How Do You Remove Existing Grass and Weeds?
Three methods remove existing vegetation: chemical kill with glyphosate, solarization using clear plastic, or mechanical removal with a sod cutter. Chemical treatment works fastest and most completely for large areas.
Glyphosate application requires two treatments 10-14 days apart to kill all vegetation. Apply on calm days when temperatures stay between 60-80°F. The grass turns brown within 7-10 days, indicating complete kill. Wait 14 days after the second application before disturbing the soil.
Solarization takes 6-8 weeks but avoids chemicals. Cover the area with clear plastic sheeting in summer heat, securing edges with soil or stakes. Ground temperatures reach 120-140°F under the plastic, killing grass and weed seeds.
Mechanical removal with a sod cutter provides immediate results but requires serious physical effort. Rent a self-propelled sod cutter for $75-100 per day. This method works best for small areas or when you want to preserve some existing soil structure.

What’s the Step-by-Step Seeding Process?
Proper seeding requires soil preparation, seed selection, application technique, and immediate watering. The University of Maryland Extension emphasizes that seed-to-soil contact determines germination success more than seed quality.
Begin by lightly cultivating the soil surface with a rake or power rake, creating a rough texture 1/4 to 1/2 inch deep. Don’t over-till, that creates dust that crusts over after watering.
Select grass seed based on your site conditions and maintenance preferences. For shady areas (less than 4 hours direct sun), choose fine fescue blends. Full sun areas handle Kentucky bluegrass or tall fescue. Perennial ryegrass works for quick establishment but demands more water.
Apply seed at recommended rates: 2-3 pounds per 1,000 sq ft for tall fescue, 1-2 pounds for Kentucky bluegrass, and 4-5 pounds for perennial ryegrass. Use a broadcast spreader set to half the recommended rate, then make a second pass perpendicular to the first for even coverage.
Get a Free Personalised Lawn Plan
Answer 3 quick questions about your lawn and we'll build a custom care plan — tailored to your grass type, climate, and biggest challenges.
Build My Lawn Plan →Lightly rake the seeded area to ensure 50% of seeds make contact with soil. Don’t bury seeds deeper than 1/4 inch. Apply starter fertilizer immediately after seeding, using rates specified on the package (typically 1-2 pounds per 1,000 sq ft).
How Do You Water and Maintain New Grass?
New grass seed requires consistent moisture for the first 21 days, with light daily watering that keeps the top 1/2 inch of soil moist. Apply 1/4 inch of water daily, divided into 2-3 short sessions to prevent runoff.
Week 1-2: Water 3 times daily for 5-7 minutes per zone. Early morning (6-8 AM), midday (12-2 PM), and evening (4-6 PM) timing prevents seed from drying out.
Week 3-4: Reduce to twice daily watering as germination peaks. Increase duration to 10-15 minutes per session, encouraging deeper root development.
Week 5-8: Transition to every other day watering with 20-30 minute sessions. This builds drought tolerance while maintaining growth.
After 8 weeks, water 2-3 times per week with 1 inch total per week, matching mature lawn requirements. Deep, infrequent watering produces stronger root systems than frequent shallow watering.

When Can You Start Mowing New Grass?
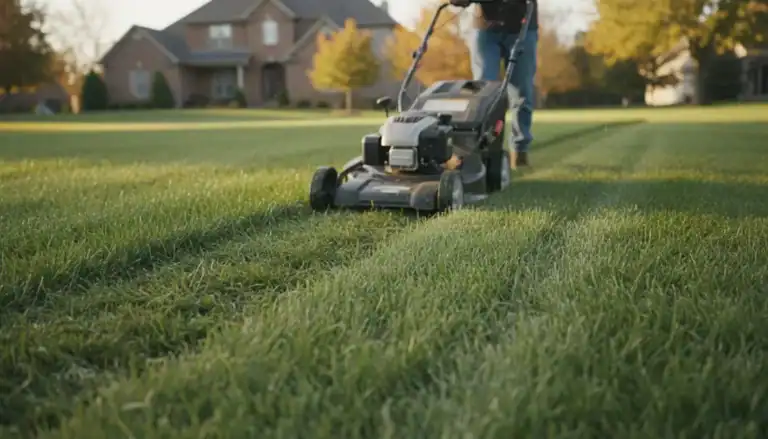
Begin mowing when new grass reaches 3-4 inches tall, typically 3-4 weeks after germination. Use the one-third rule: never remove more than one-third of the blade length in a single cutting.
Set your mower height to 3 inches for the first several cuttings. Sharp blades prevent tearing young grass plants. Dull blades create brown tips and stress new seedlings.
Mow when grass blades are dry to prevent clumping and disease issues. Early morning mowing works best, allowing cut grass to dry before evening moisture develops.
Continue weekly mowing through fall, gradually lowering cutting height to 2.5 inches for the final cut before winter. This prevents snow mold and other fungal diseases during dormancy.
How Much Does Lawn Renovation Cost?
DIY lawn renovation costs $0.10-0.25 per square foot for materials and equipment rental. A typical 5,000 square foot lawn renovation runs $500-1,250 when you do the work yourself.
Professional renovation costs $0.50-1.50 per square foot depending on site conditions and grass type selection. The same 5,000 square foot area costs $2,500-7,500 professionally installed.
Major cost factors include soil amendments (lime, compost, fertilizer), seed selection, and equipment rental. Premium grass seed adds $50-100 to project costs but improves long-term success rates significantly.
| Cost Component | DIY Cost (5,000 sq ft) | Professional Cost |
|---|---|---|
| Soil Test | $20-30 | Included |
| Herbicide Treatment | $40-60 | $200-300 |
| Soil Amendments | $150-300 | $400-600 |
| Grass Seed (Premium) | $100-200 | $300-500 |
| Equipment Rental | $200-300 | N/A |
| Labor | Your time | $1,500-4,000 |
| Total | $510-890 | $2,400-5,400 |

What Are Common Renovation Mistakes to Avoid?
Poor timing causes most renovation failures. Seeding too late in fall or during summer heat stress dramatically reduces establishment success. Plan renovation dates around consistent temperatures between 60-75°F for optimal germination.
Inadequate soil preparation ranks as the second biggest mistake. Skipping soil tests, failing to address pH issues, or seeding into compacted soil creates poor growing conditions that doom grass establishment.
Honestly, overwatering kills more new grass than underwatering. Soggy soil promotes fungal diseases and prevents root development. Light, frequent watering during germination followed by deeper, less frequent watering produces healthier lawns.
Cheap seed selection often leads to thin, disease-prone lawns. From our experience, investing in certified seed blends appropriate for your growing conditions pays off. The $50-100 difference between economy and premium seed delivers better establishment and long-term performance.
Impatient mowing damages new grass. Wait until grass reaches 3-4 inches before the first cut, and make sure mower blades are sharp. Scalping young grass sets back establishment by several weeks, we’ve seen people ruin weeks of progress with one bad cut.