Installing artificial grass requires excavating 3-4 inches of soil, creating a proper base with gravel and sand, and carefully seaming the turf sections together. Most homeowners can knock out a 500-square-foot installation in 2-3 days with basic tools, though here’s the thing, proper ground preparation eats up 70% of your time.
Key Takeaways
- Excavate 3-4 inches deep and install 2-3 inches of compacted gravel base plus 1 inch of leveling sand
- Quality artificial grass costs $5-12 per square foot installed, with DIY saving $3-6 per square foot on labor
- Plan for 15-20% extra material for cuts and waste, especially around curves and obstacles
- Use 6-8 inch galvanized nails every 8-10 inches along edges and 12 inches on interior seams
- Allow 2-4 hours of expansion time before final trimming in temperatures above 80°F
What Tools and Materials Do You Need for Artificial Grass Installation?
You’ll need both excavation tools and precision installation equipment. The most critical tools? A plate compactor (rent for $40-60/day), sharp utility knife with extra blades, and a power broom for infill distribution. Don’t cheap out on the compactor, we’ve seen too many installations fail because someone tried to use a hand tamper.
Essential Tools:
- Shovel and rake for excavation
- Plate compactor (minimum 200-pound force)
- Level (4-foot minimum)
- Sharp utility knife with hooked blades
- Measuring tape and chalk line
- Hammer or nail gun
- Power broom or stiff push broom
Materials Needed:
- Artificial grass (order 15-20% extra)
- Class II road base or decomposed granite (0.15 tons per square foot at 3-inch depth)
- Leveling sand (0.05 tons per square foot at 1-inch depth)
- Landscape fabric or weed barrier
- 6-8 inch galvanized nails or landscape staples
- Seaming tape and outdoor adhesive (for joins)
- Silica sand infill (20-25 pounds per 100 square feet)

How Do You Prepare the Ground for Artificial Grass?
Ground preparation determines whether your artificial grass lasts 10 years or needs repairs within 2-3 years. Remove all existing grass, weeds, and debris, then excavate to create proper drainage slope. This is where most people mess up.
Step 1: Mark and Measure
Use spray paint to outline your installation area. Measure twice and add 6 inches to each dimension for trimming allowance. Calculate square footage by multiplying length × width, adding 15-20% for waste. Trust us, you’ll need every bit of that extra material.
Step 2: Remove Existing Vegetation
Cut existing grass as short as possible, then use a sod cutter (rent for $35-45/day) or sharp spade to remove all organic material. Remove roots completely, decomposing organics create soft spots and drainage issues down the road.
Step 3: Excavate and Grade
Dig down 3-4 inches below your desired finished height. Create a 2-3% slope away from structures (1/4 inch drop per foot). Use a string line and level to maintain consistent depth and grade.
What Base Materials Create the Best Foundation?
A properly constructed base prevents settling, improves drainage, and provides the firm surface artificial grass needs. The two-layer system, gravel base plus leveling sand, handles both structural support and surface smoothness. Skip either layer and you’re asking for trouble.
Gravel Base Layer (2-3 inches):
Use Class II road base, decomposed granite, or 3/8-inch minus gravel. Avoid pea gravel or river rock, they don’t compact properly. Install in 1-inch lifts, compacting each layer with 4-6 passes of a plate compactor until firm.
Sand Leveling Layer (1 inch):
Use concrete sand or masonry sand, not play sand or fine sand. Screed level using a straight 2×4 board. The sand layer should be just firm enough to walk on without leaving deep footprints.
| Base Material | Cost per Ton | Compaction Rate | Drainage Quality | Best Use |
|---|---|---|---|---|
| Class II Road Base | $25-35 | Excellent | Very Good | Most installations |
| Decomposed Granite | $35-45 | Very Good | Excellent | High-drainage areas |
| 3/8″ Minus Gravel | $30-40 | Good | Good | Budget installations |
| Concrete Sand | $40-50 | Good | Fair | Leveling layer only |

How Do You Install Weed Barrier and Edge Restraints?
Weed barrier and solid edging prevent future maintenance headaches. Install these before laying turf to avoid disturbing your carefully prepared base. In our experience, people who skip edge restraints always regret it within the first year.
Weed Barrier Installation:
Roll landscape fabric over the entire prepared area, overlapping seams by 6 inches. Use landscape staples every 3 feet along edges and seams. Choose fabric with 3-5 year UV rating, cheap materials break down and create maintenance issues.
Edge Restraint Options:
Artificial grass needs solid edges to prevent shifting and curling. Plastic benderboard works for gentle curves, while aluminum or steel edging handles straight lines and sharp corners. Install edging flush with your desired finished height.
What’s the Correct Way to Measure, Cut, and Position Artificial Grass?
Artificial grass has a grain direction, all pieces must face the same way or you’ll see color differences. Plan your layout before unrolling to minimize seams and waste. This is where rookie mistakes become glaringly obvious.
Planning Your Layout:
Sketch your area and mark obstacles like sprinkler heads, trees, or planters. Position seams away from high-traffic areas when possible. Run the longest pieces parallel to your most common viewing angle.
Measuring and Cutting:
Unroll turf in a clean, flat area. Let it acclimate for 2-4 hours in temperatures above 80°F to prevent expansion after installation. Cut from the backing side using a sharp utility knife, replacing blades frequently. Dull blades create ragged cuts that show.
Grain Direction:
Run your hand across the grass surface. Pile should lean toward your house or primary viewing area. Mark the back of each piece with arrows showing grain direction before moving. Mixing grain directions is an amateur mistake you can’t easily fix.

How Do You Create Professional Seams Between Grass Pieces?
Visible seams are the hallmark of amateur installation. Professional-looking seams require precise cutting, proper adhesive application, and careful alignment of grass blades. We’ve found that most DIY failures happen right here.
Preparing Seam Edges:
Overlap pieces by 1/4 inch, then cut through both layers simultaneously for perfect alignment. Remove any loose backing material or damaged grass blades from cut edges. This extra prep work makes all the difference.
Seaming Process:
Place 4-6 inch seaming tape under the joint, adhesive side up. Apply outdoor turf adhesive in a zigzag pattern, then carefully join pieces. Avoid getting adhesive on grass blades, it’s nearly impossible to remove and looks terrible.
Seam Alignment:
Get a Free Personalised Lawn Plan
Answer 3 quick questions about your lawn and we'll build a custom care plan — tailored to your grass type, climate, and biggest challenges.
Build My Lawn Plan →Use a putty knife to interweave grass blades across the seam. Work slowly, you have about 10 minutes before adhesive sets. Weight the seam with sandbags for 2-4 hours.
What Nailing Pattern Ensures Long-Term Stability?
Proper nailing prevents shifting, rippling, and edge lifting. Use more nails than you think you need, under-nailed installations fail within 2-3 years. We see this constantly with first-time installers who try to save on nails.
Nail Specifications:
Use 6-8 inch galvanized roofing nails or landscape staples. Stainless steel nails cost 40% more but prevent rust stains in areas with high iron content in water.
Installation Pattern:
Nail every 8-10 inches around perimeters, 6 inches apart at seams, and every 12-18 inches across the field. Drive nails flush with backing, protruding nails create trip hazards and wear points.

How Much Infill Do You Need and How Do You Apply It?
Infill weighs down the turf, helps blades stand upright, and provides cushioning. Too little infill causes premature wear; too much makes the surface hard and unnatural. Getting this balance right separates good installations from great ones.
Infill Types and Amounts:
- Silica sand: 20-25 pounds per 100 sq ft (most common)
- Crumb rubber: 15-20 pounds per 100 sq ft (softer, more expensive)
- Organic infill: 25-30 pounds per 100 sq ft (antimicrobial properties)
Application Method:
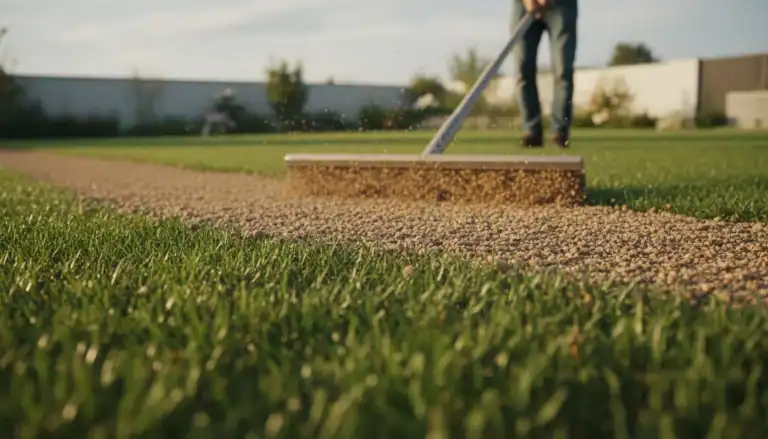
Spread infill evenly with a drop spreader, then work it down to the backing using a power broom or stiff push broom. Brush against the grain direction to lift grass blades. Add infill gradually, you can always add more, but removing excess is a nightmare.
What Are the Most Common Installation Mistakes to Avoid?
From our experience installing and repairing artificial grass, these errors account for 80% of premature failures and customer complaints. Honestly, most of these are completely preventable.
Base Preparation Errors:
- Insufficient excavation depth (causes settling and drainage issues)
- Poor compaction (creates soft spots and uneven surface)
- Wrong base materials (pea gravel and decomposed organics don’t work)
- Inadequate drainage slope (standing water damages backing)
Installation Mistakes:
- Mixing grain directions (creates visible color differences)
- Under-nailing edges (causes lifting and rippling)
- Rushing the cutting process (leads to gaps and overlaps)
- Inadequate infill (causes premature blade wear)

How Do You Maintain Artificial Grass After Installation?
Proper maintenance extends artificial grass life from 10-12 years to 15-20 years. The key is regular grooming and prompt attention to any drainage or edge issues. Skip maintenance and you’ll be replacing sections way sooner than expected.
Monthly Maintenance:
- Remove debris with leaf blower or rake
- Brush high-traffic areas with stiff broom
- Check edges for lifting or separation
- Rinse away dust and pollen monthly
Seasonal Tasks:
- Add infill to worn areas (typically 5-10 pounds per year)
- Check and repair any loose nails or staples
- Trim any vegetation growing through edges
- Deep clean with turf deodorizer if pets use the area
What Does Professional Installation Cost Compared to DIY?
Professional installation costs $8-15 per square foot total, while DIY costs $5-12 per square foot in materials. For most homeowners, DIY saves $1,500-3,000 on a typical 500-square-foot project. The question is whether your time and potential mistakes are worth the savings.
| Project Size | DIY Material Cost | Tool Rental Cost | Professional Cost | DIY Savings |
|---|---|---|---|---|
| 300 sq ft | $1,800-3,600 | $200-300 | $3,600-5,400 | $1,600-2,700 |
| 500 sq ft | $3,000-6,000 | $250-350 | $6,000-9,000 | $2,750-4,200 |
| 1000 sq ft | $6,000-12,000 | $300-400 | $12,000-18,000 | $5,700-8,600 |
When to Hire Professionals:
- Areas larger than 1,000 square feet
- Slopes steeper than 15%
- Complex drainage issues
- Limited time (professional installation takes 1-2 days vs 3-5 days DIY)
Most homeowners can successfully install artificial grass with proper planning, quality materials, and attention to base preparation. The key is taking time with ground preparation, rush this step and you’ll pay for it later with repairs and replacements.